Tutorial: Creating a Workflow
Tutorial: Creating a Workflow
This tutorial walks you through creating a verification workflow from scratch using the visual graph builder. By the end, you’ll have a workflow that verifies a user’s identity with document scanning, facial recognition, age verification, and duplicate detection.
Prerequisites
- A Verifa account (sign up)
- Access to the dashboard in Sandbox mode
Step 1: Navigate to Workflows
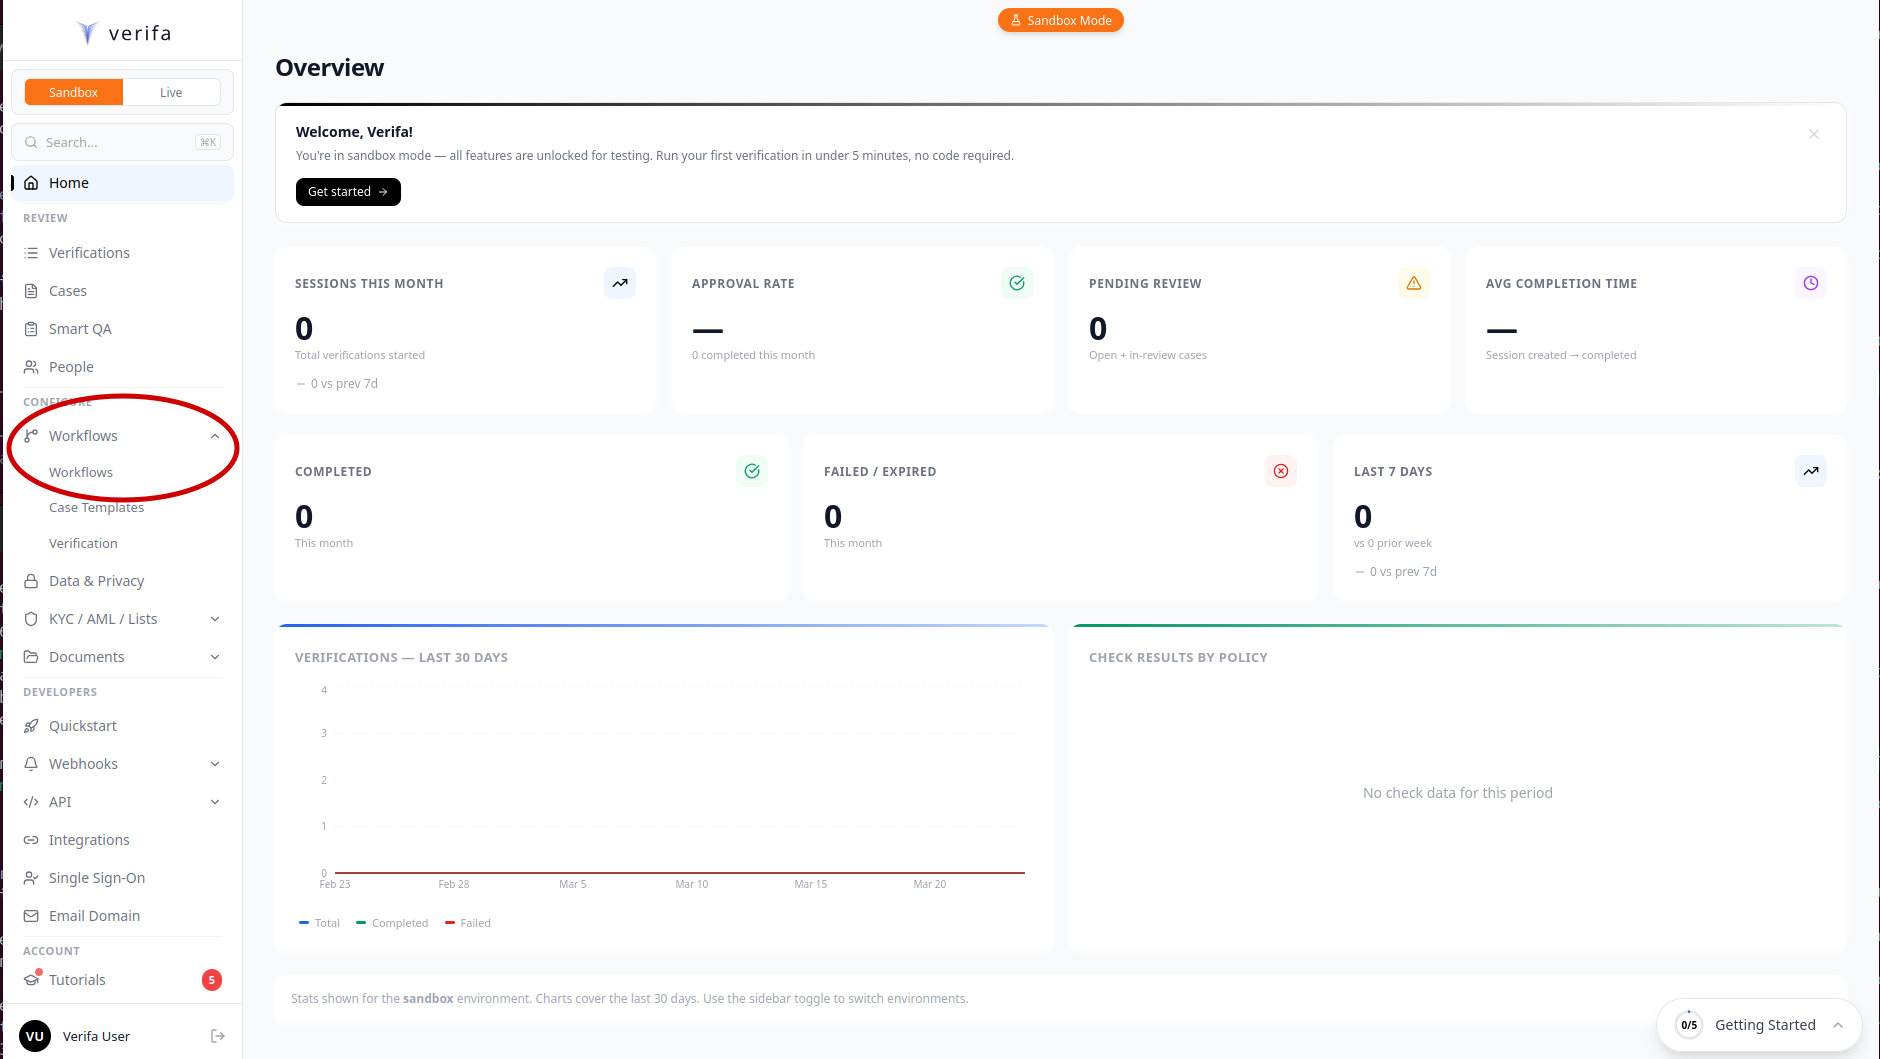
From the dashboard, expand the Workflows section in the left sidebar under Configure, then click Workflows.
Step 2: Create a new workflow
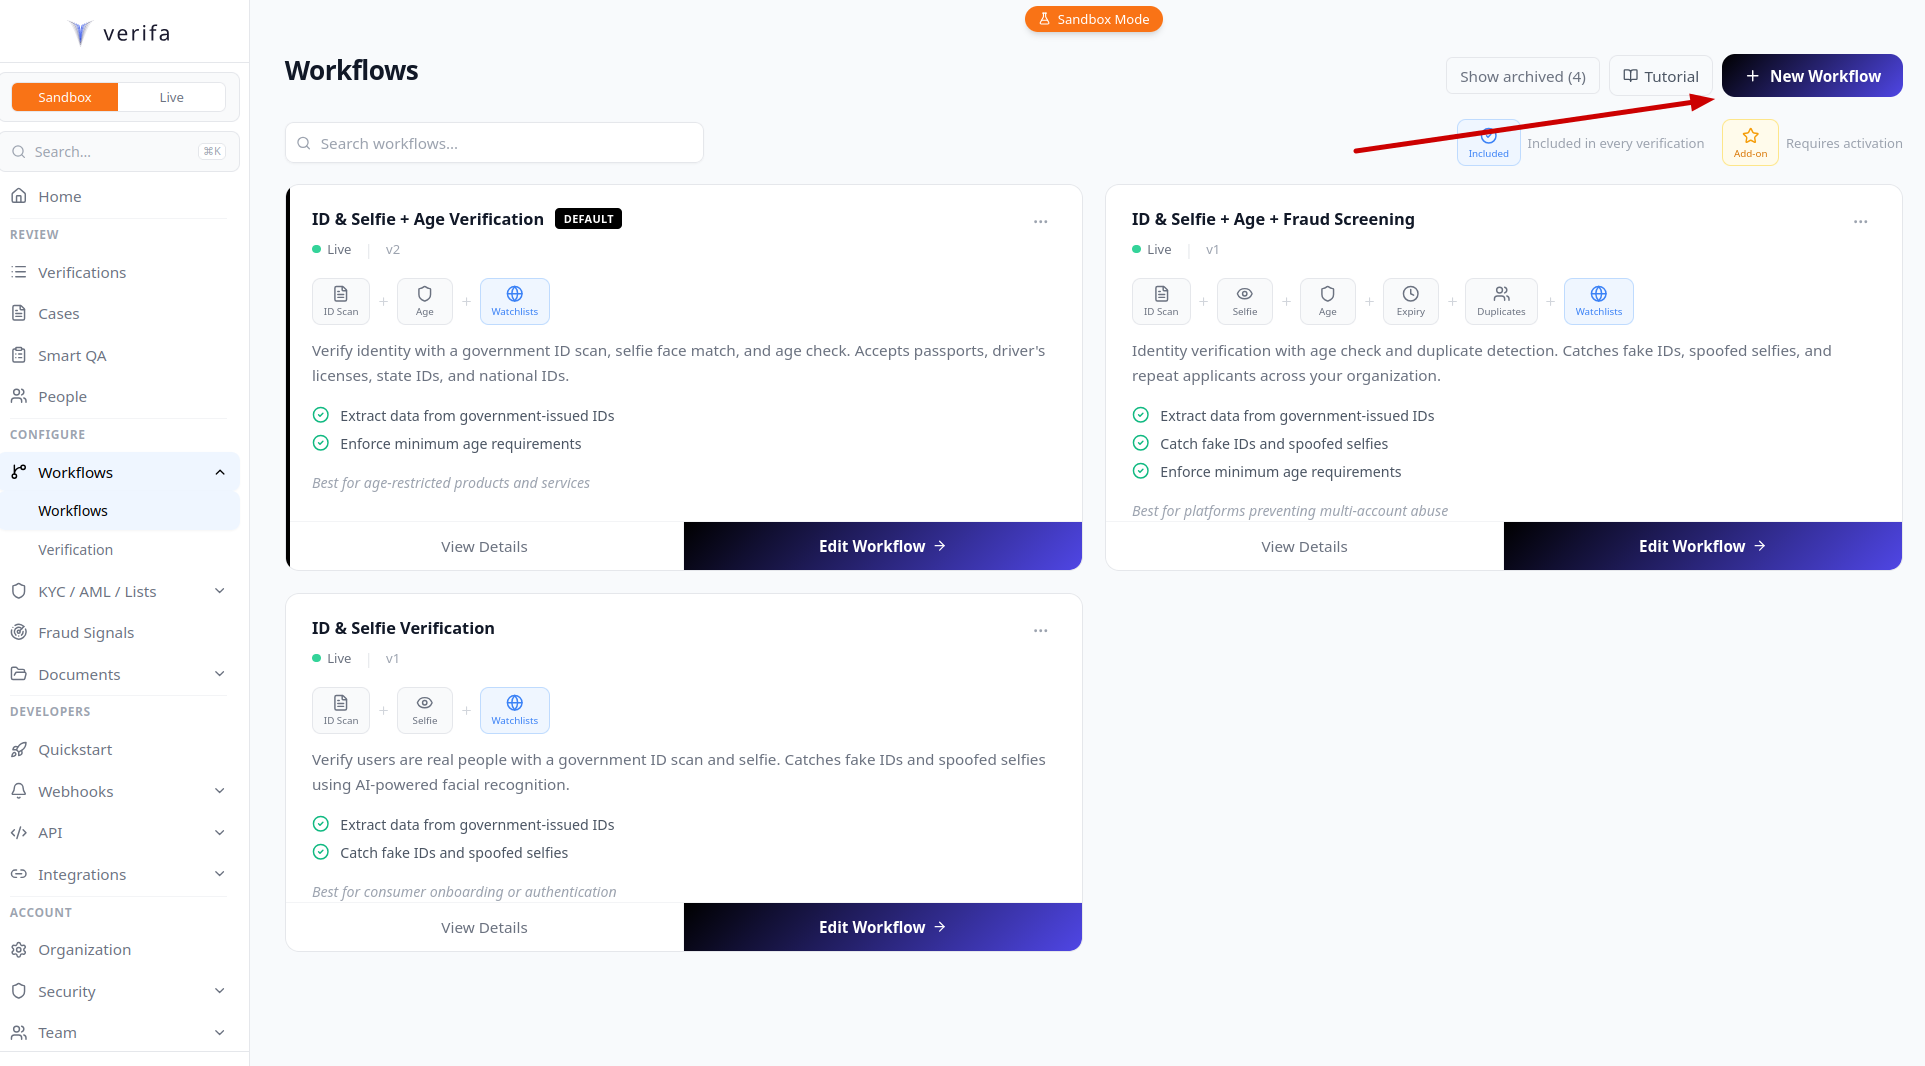
You’ll see your existing workflows displayed as cards, each showing the workflow’s name, version, included checks, and a description. Your organization starts with default workflows like ID & Selfie + Age Verification.
Click + New Workflow in the top right corner to create a new one.
Step 3: Choose a starting point
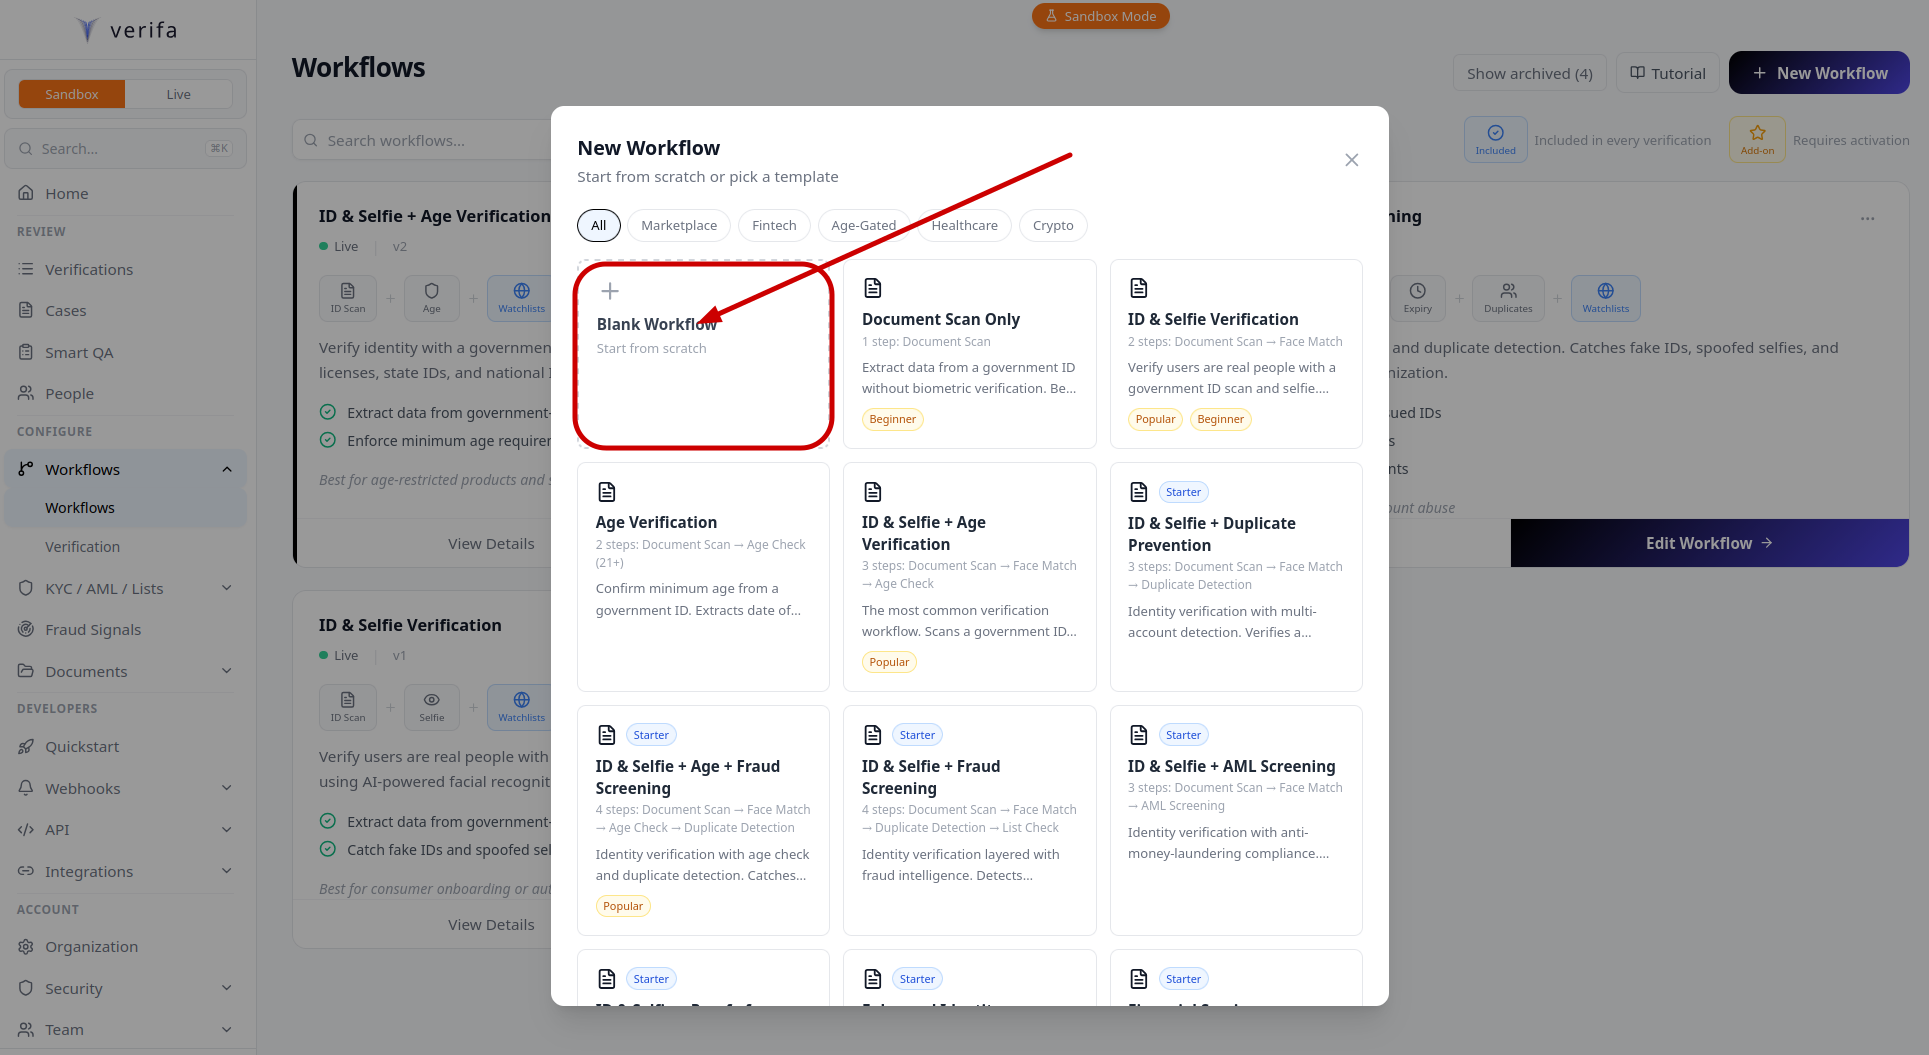
A New Workflow modal appears with template options. You can start from scratch or pick a pre-built template like Document Scan Only, Age Verification, ID & Selfie + Age Verification, ID & Selfie + Duplicate Prevention, and more.
For this tutorial, select Blank Workflow to build everything step by step.
Step 4: Configure capture requirements
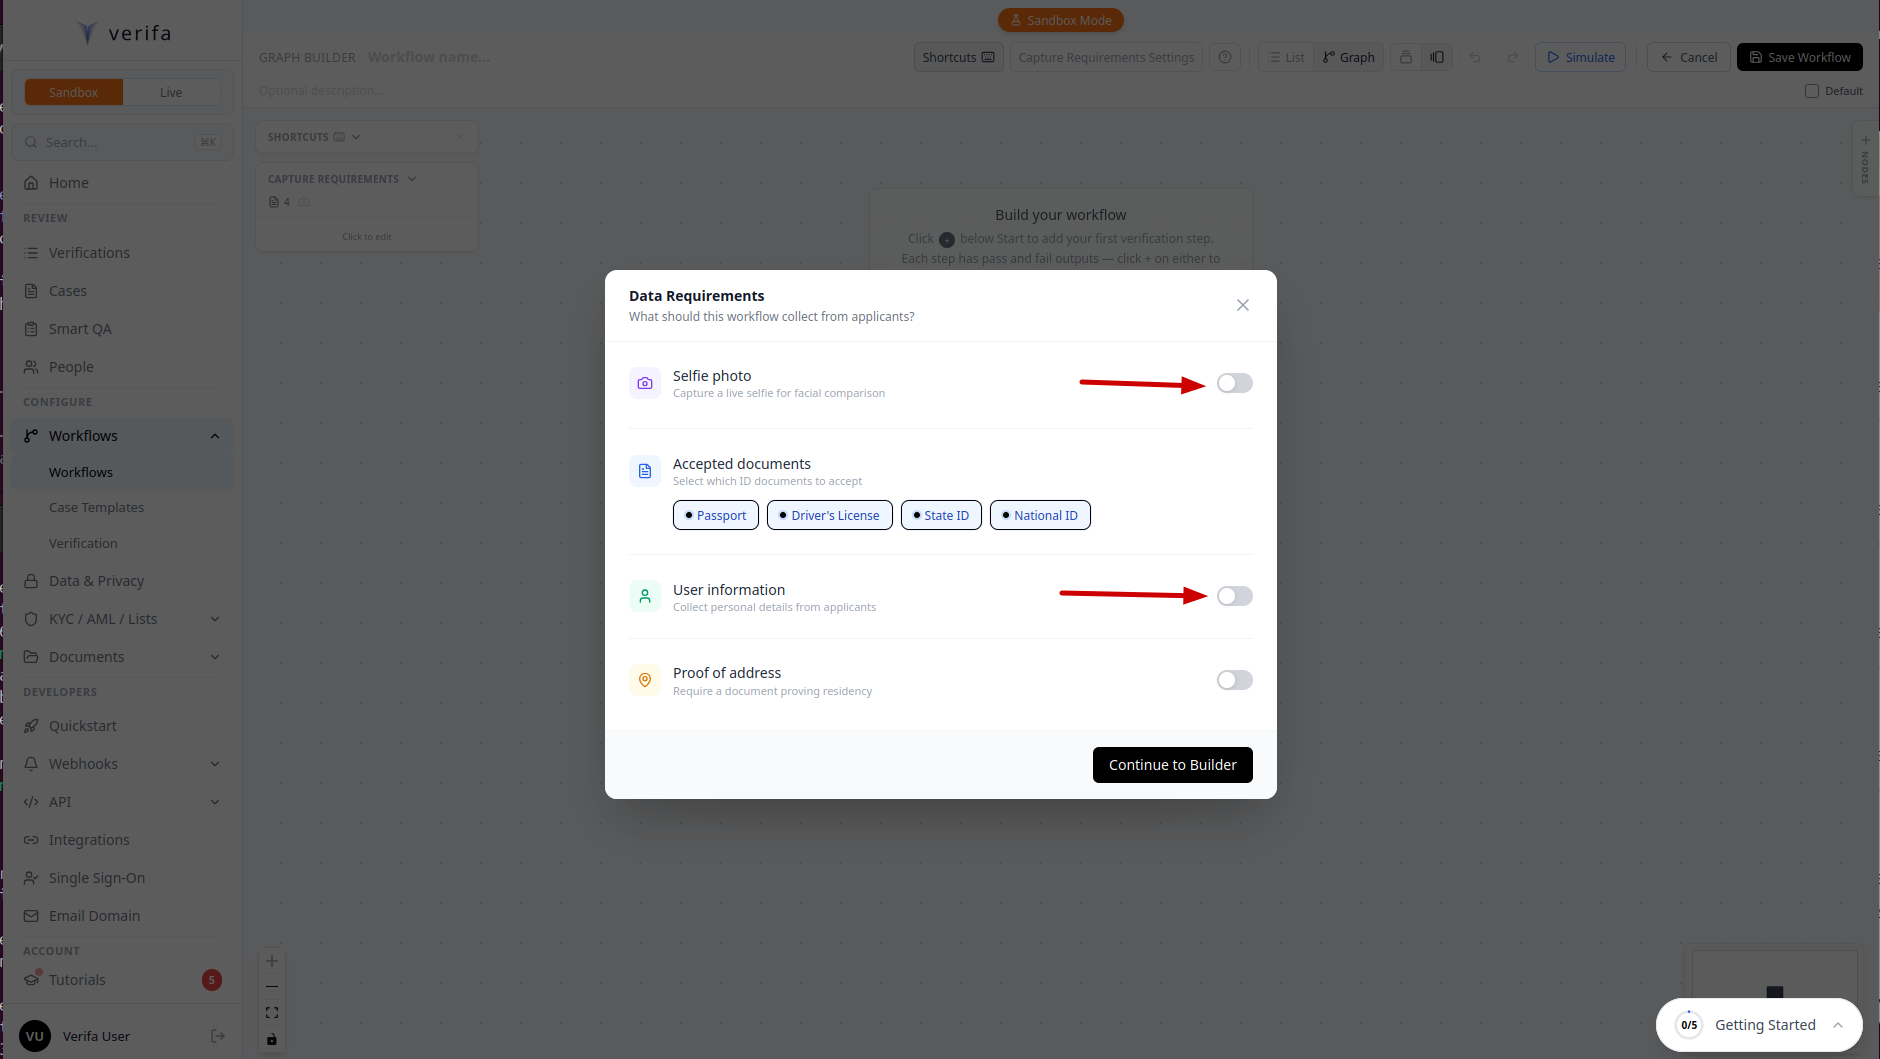
Before building the graph, Verifa asks what data the workflow should collect from applicants during the capture flow.
Enable selfie capture
Toggle on Selfie photo to require a live selfie for facial comparison. This is needed for the Facial Recognition check later.
Enable user information
Toggle on User information to collect personal details from applicants during the capture flow.
Select user info fields
After enabling User information, the field configuration expands. For this tutorial, enable the following fields and set them to required:
- First Name — collect, required
- Last Name — collect, required
- Email — collect, required
- Phone — collect, required
You can leave Date of Birth, SSN, and Address disabled for now — the document scan will extract date of birth automatically from the ID.
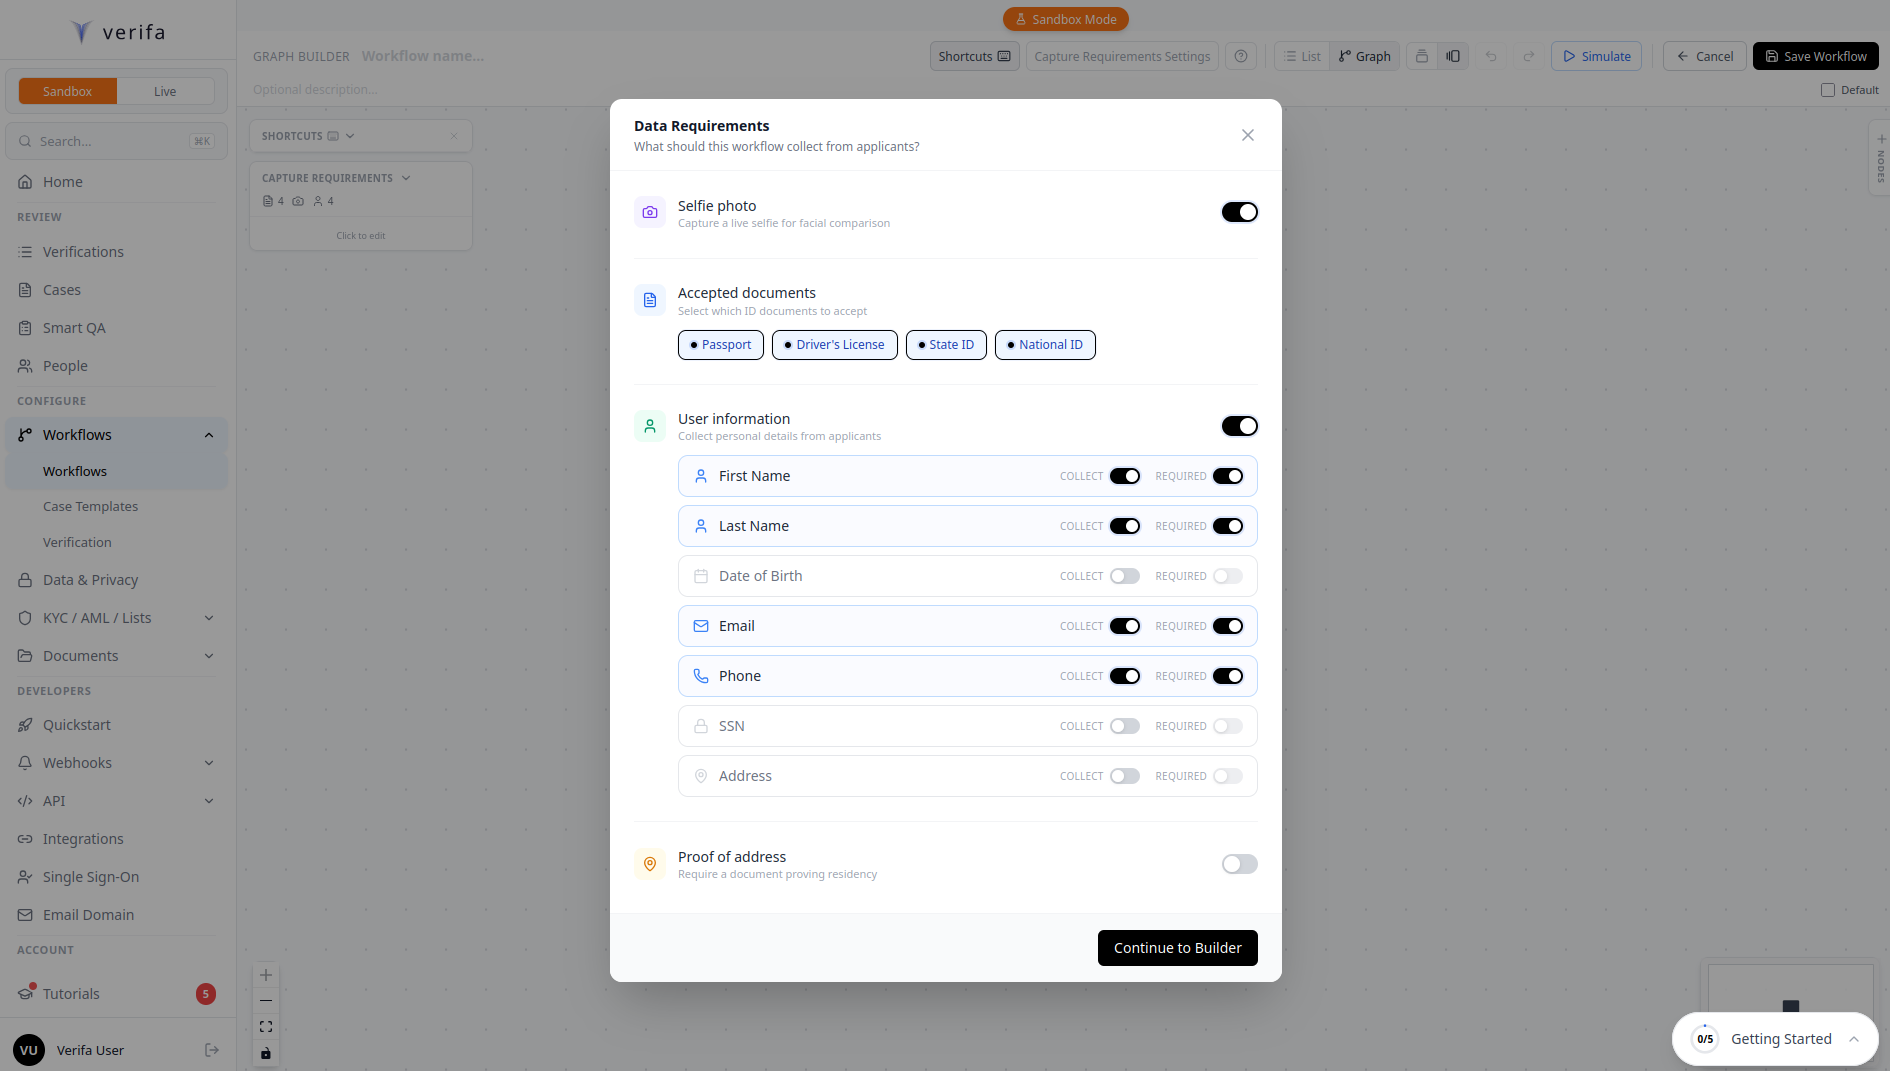
Click Continue to Builder when you’re done.
Step 5: Understand the graph builder
A quick tutorial modal explains how the workflow graph works. Every workflow starts with a Capture node at the top. From there, you build a chain of verification checks, branches, and outcomes. Data flows top-to-bottom through each node.
Think of it as a flowchart — each path represents a route an applicant can take through your verification process.
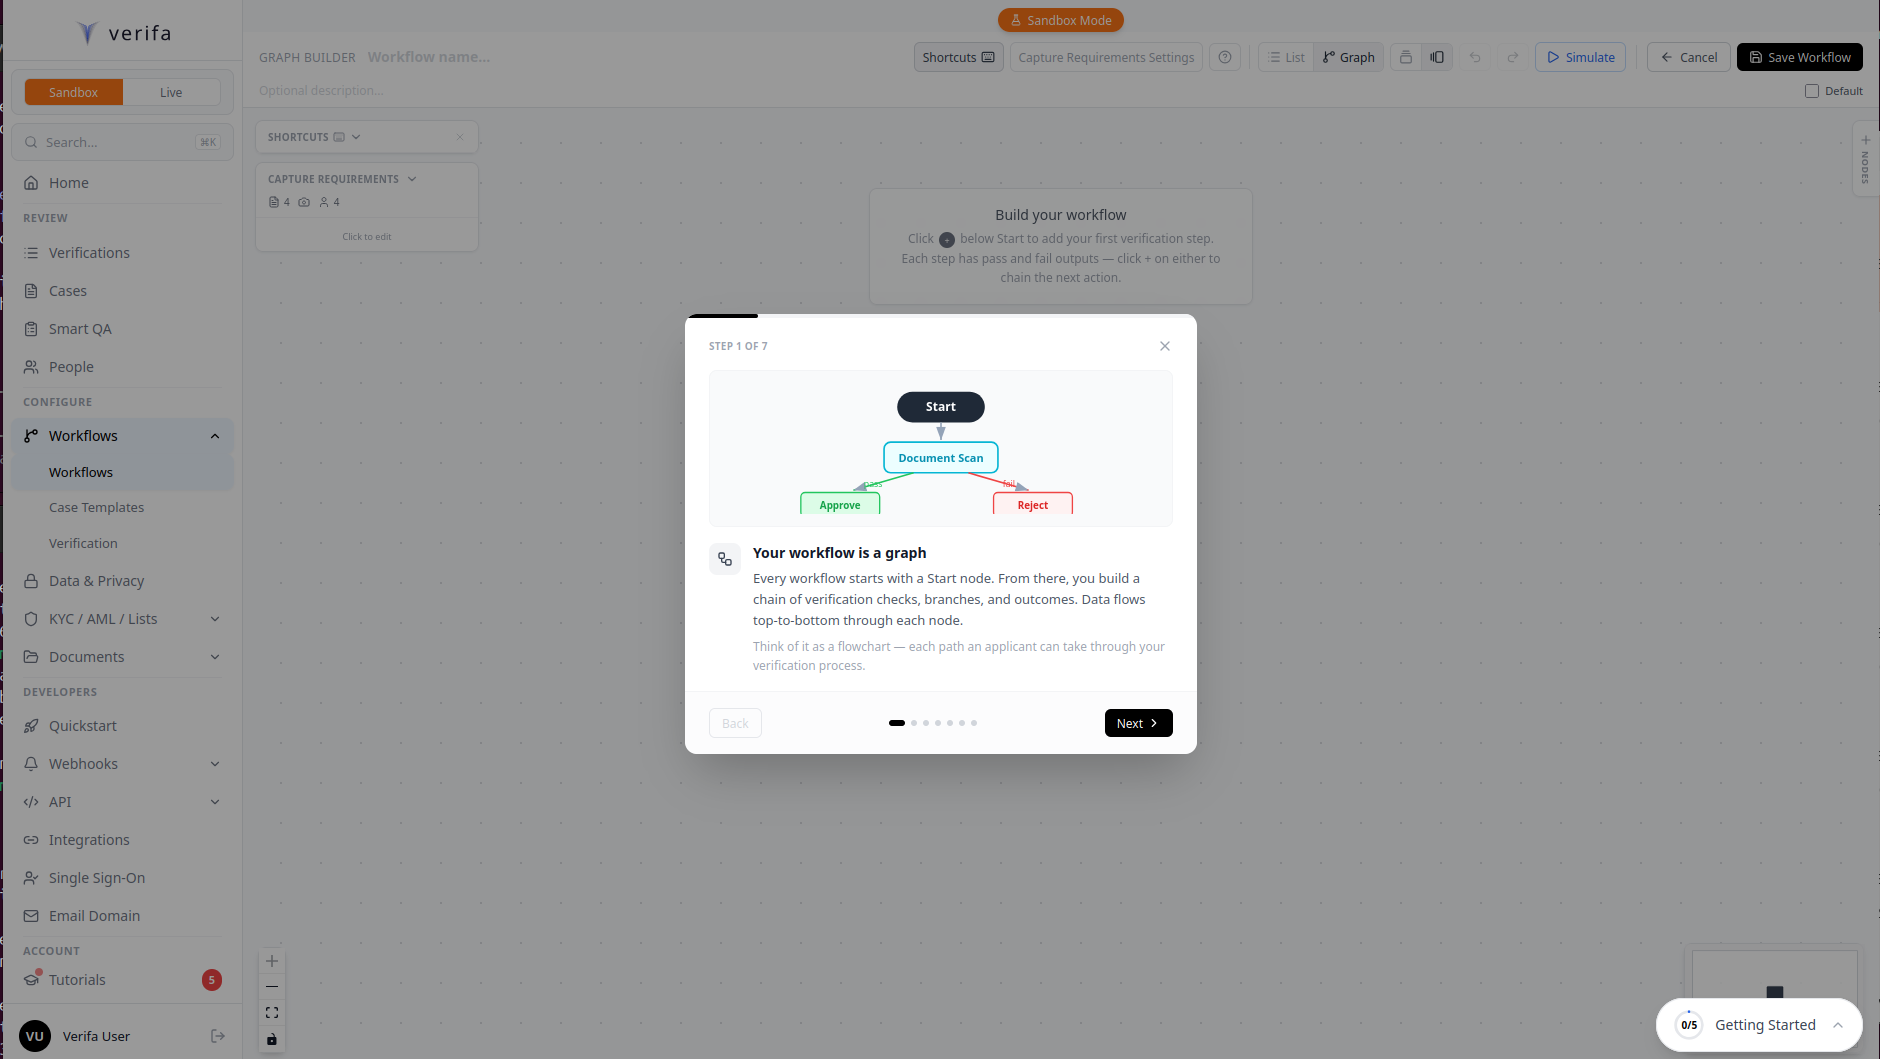
Click X to dismiss the tutorial (or click through all the tips — they’re helpful for first-time users).
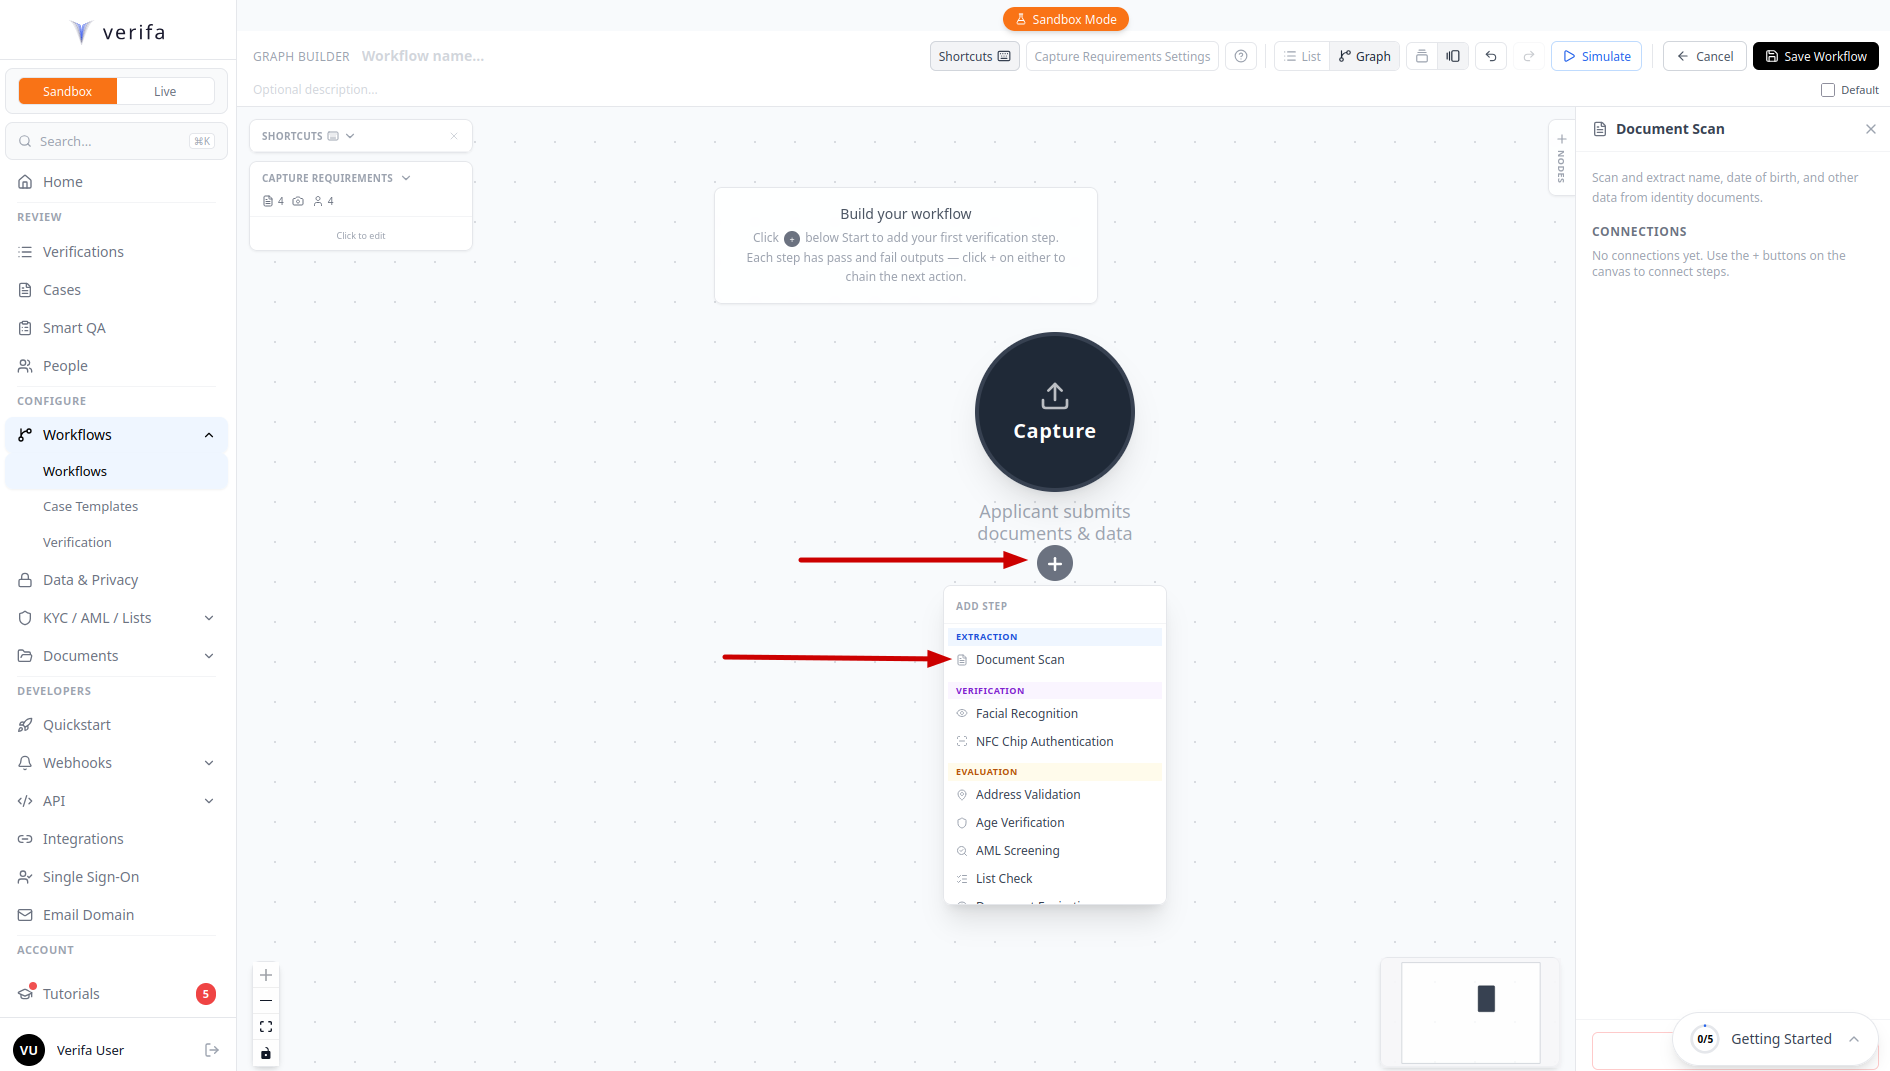
Step 6: Add Document Scan
Click the + button below the Capture node to add your first verification step. The Add Step menu appears with all available checks organized by category:
- Extraction — Document Scan
- Verification — Facial Recognition, NFC Chip Authentication
- Evaluation — Address Validation, Age Verification, AML Screening, List Check, and more
Select Document Scan. This check extracts the applicant’s name, date of birth, address, and document number from their ID.
Step 7: Add Facial Recognition
Now add Facial Recognition after Document Scan. Click the + button on the pass output of the Document Scan node, then select Facial Recognition from the Add Step menu.
This check compares the applicant’s selfie against the photo on their ID document.
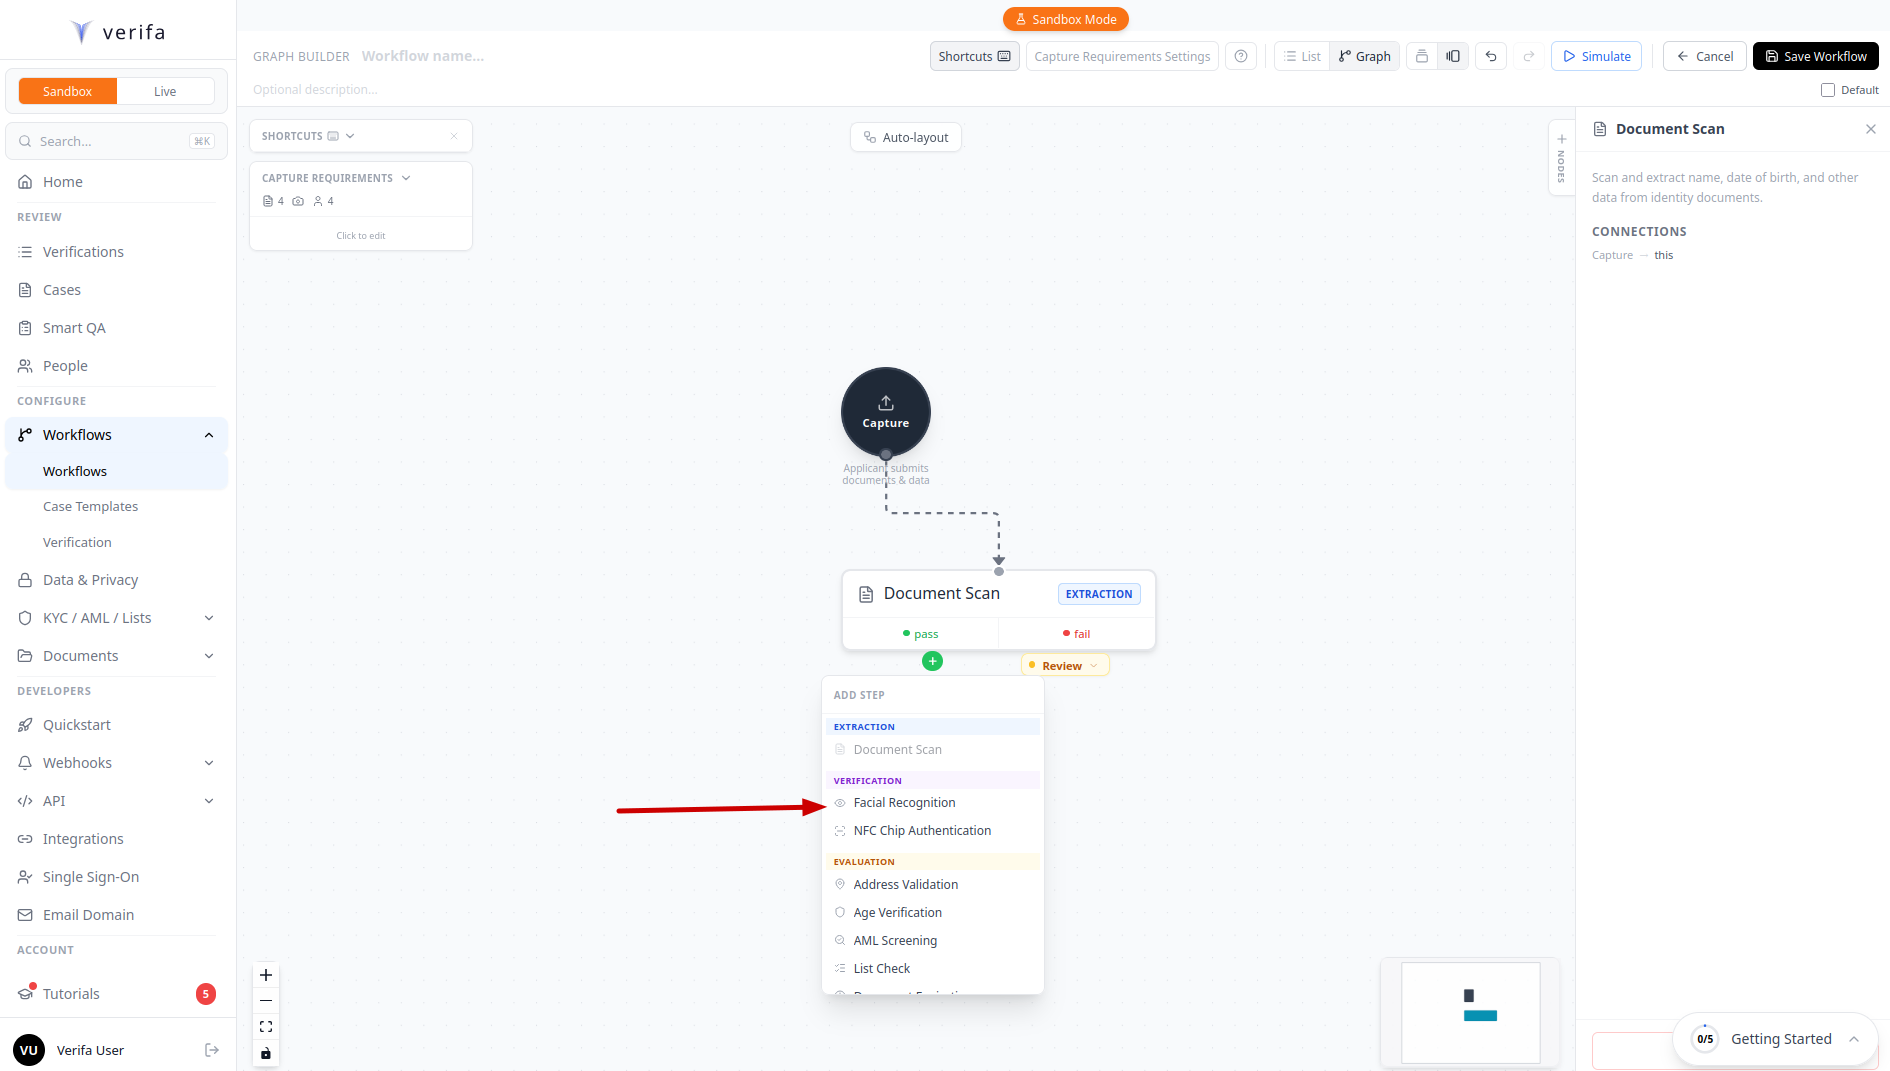
Press Spacebar at any time to auto-align and organize the graph nodes. This keeps your workflow tidy as you add more steps.
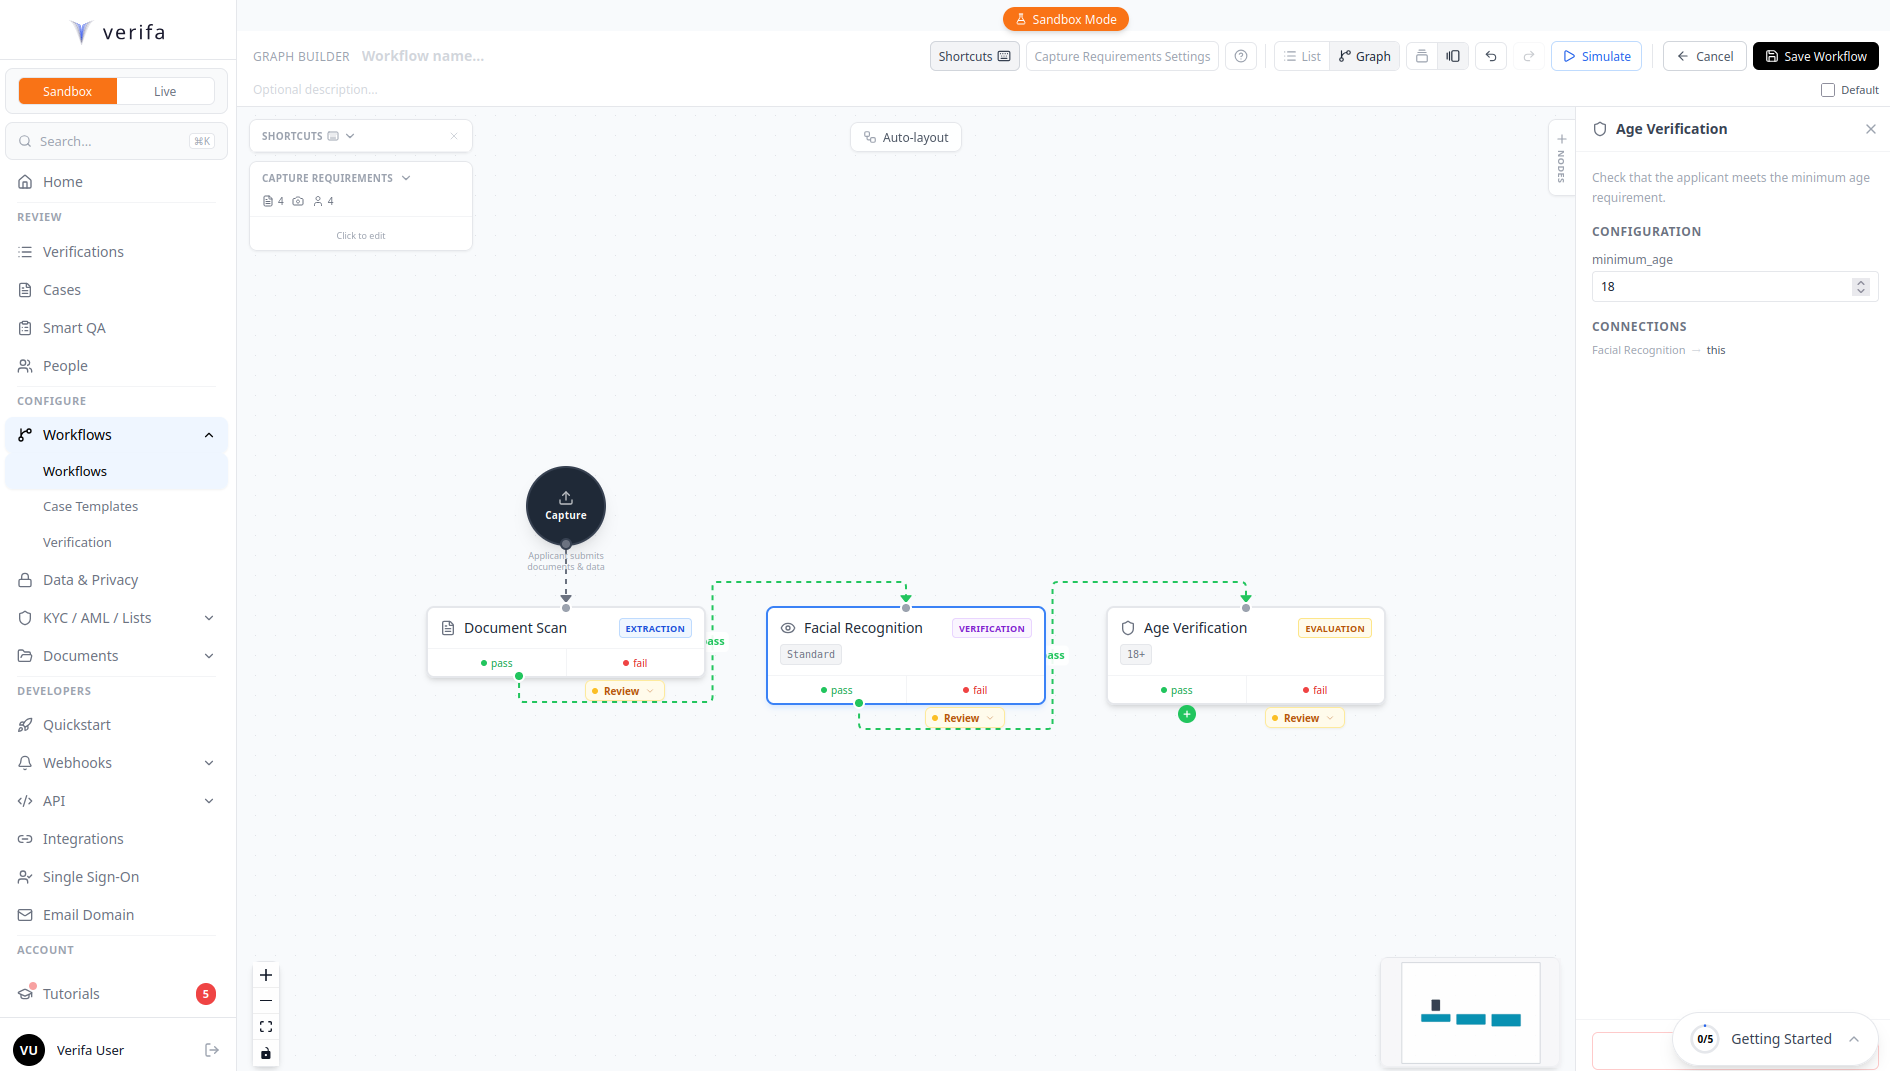
Step 8: Add Age Verification
Repeat the same process — click the + on the pass output of Facial Recognition and select Age Verification.
When you click on the Age Verification node, the configuration panel opens on
the right side. Here you can set the minimum_age threshold. The default is
18, but you can change it to any value (e.g., 21 for alcohol delivery, 25
for car rentals).
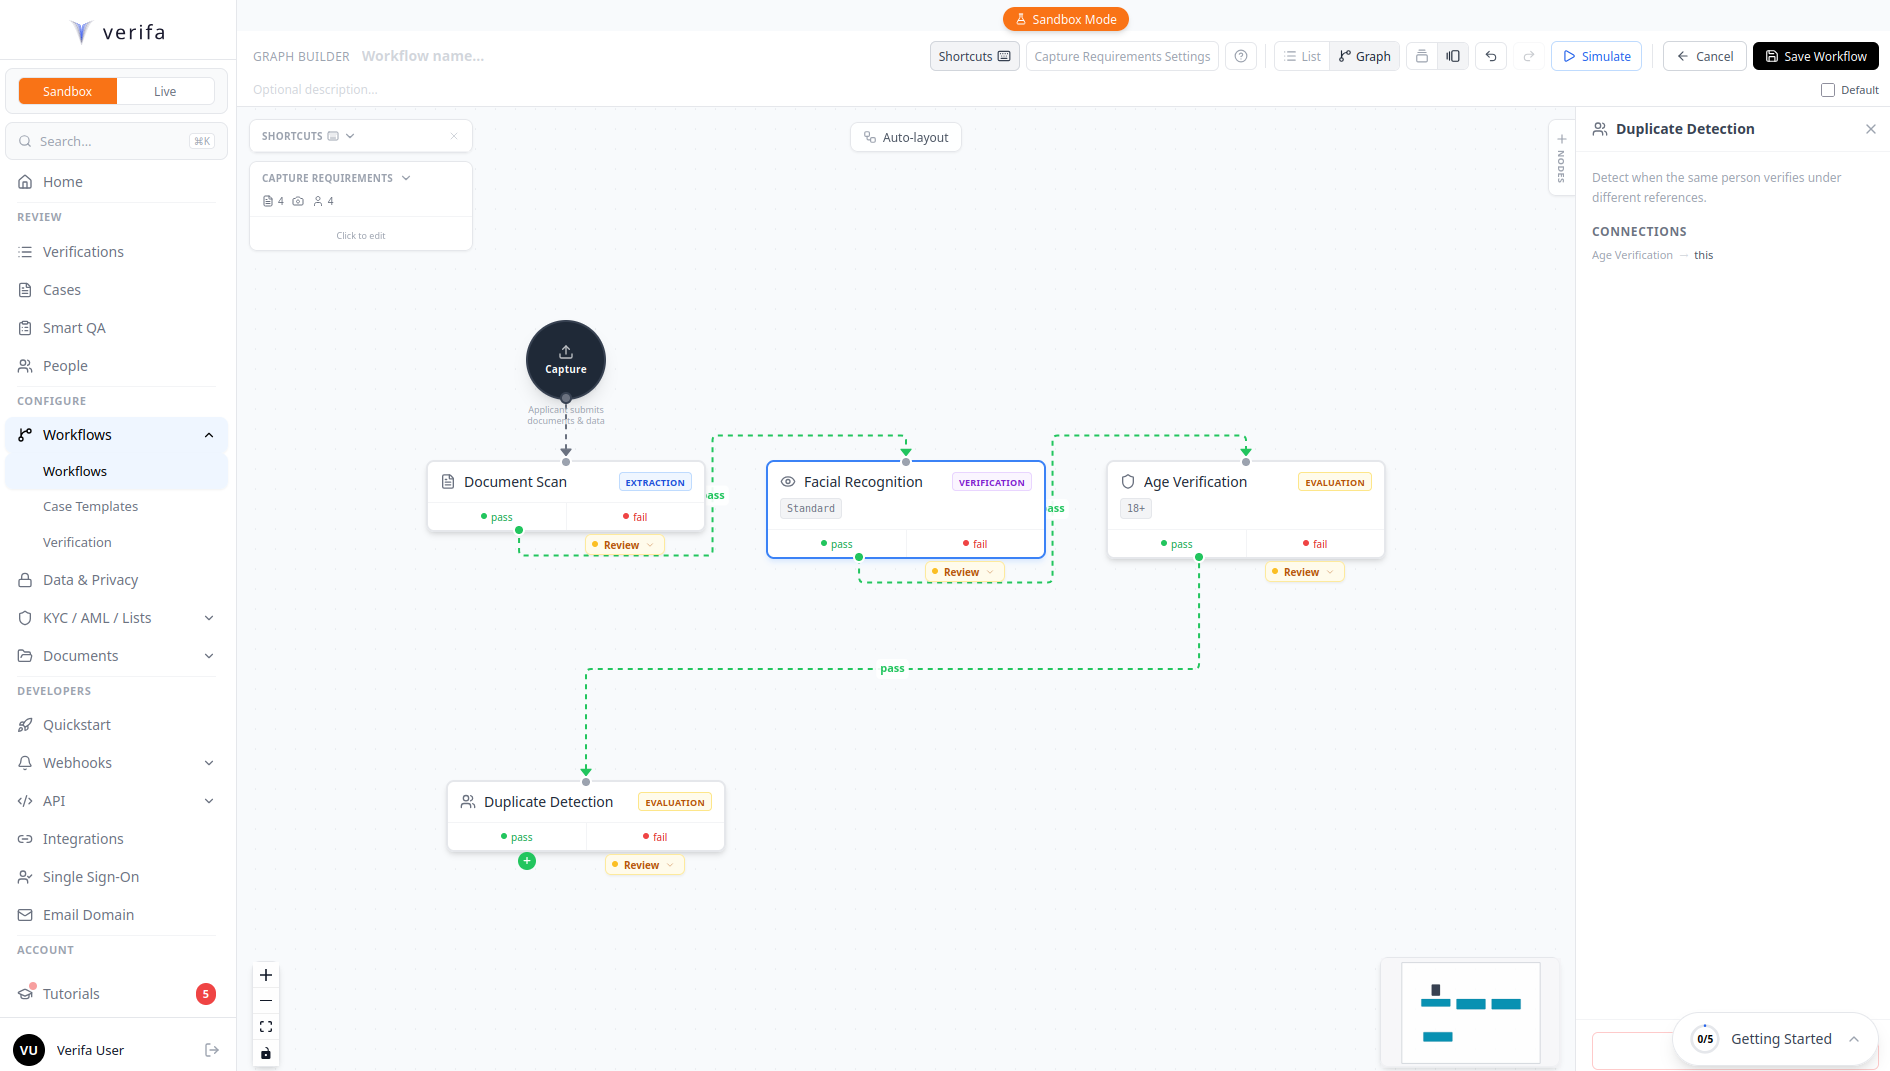
Step 9: Add Duplicate Detection
Click the + on the pass output of Age Verification and select Duplicate Detection. This check searches for the same person across all previous sessions using hashed device fingerprints, email, phone, document number, and face embeddings.
Press Spacebar to auto-layout the graph after adding the node.
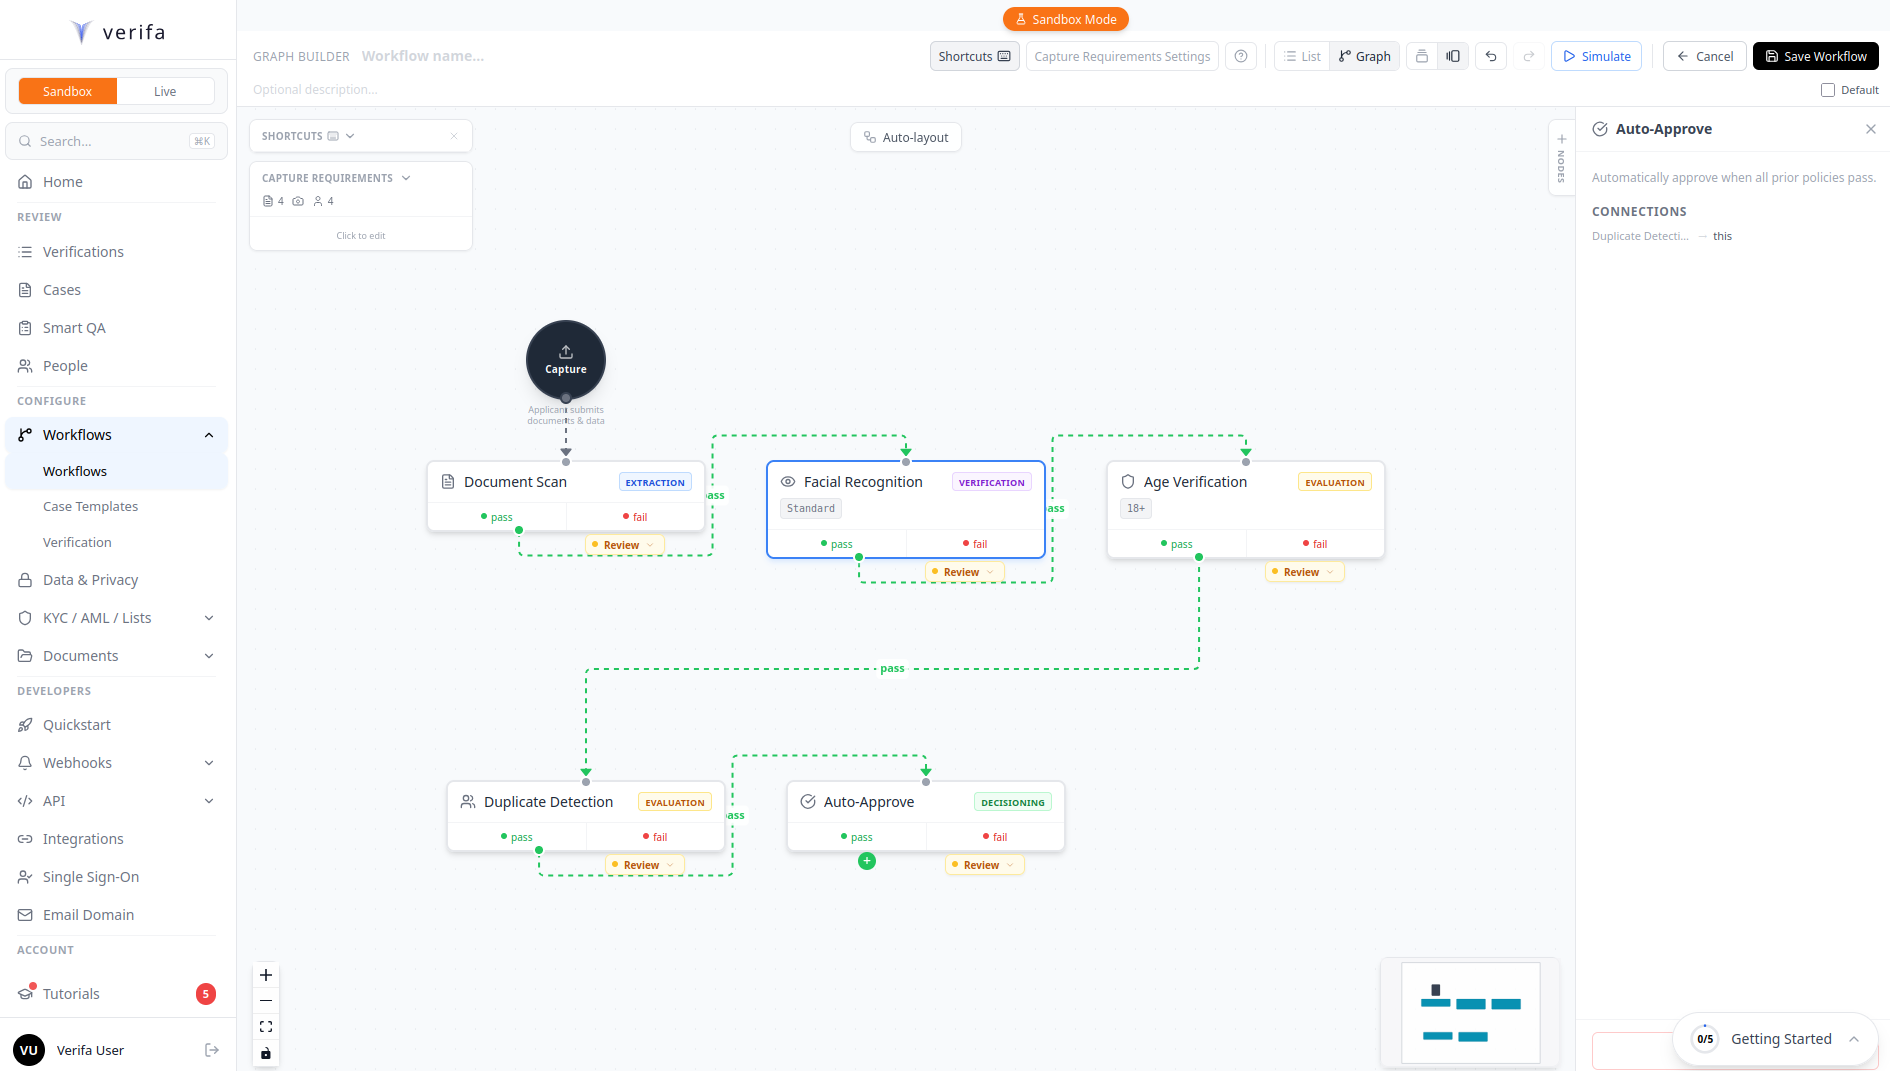
Step 10: Add Auto-Approve
Finally, click the + on the pass output of Duplicate Detection and select Auto-Approve. This is the decisioning step — if all prior checks passed, the session is automatically approved. If any check failed, the session routes to manual review or rejection.
Your complete workflow now looks like this:
Each step also has a fail output that routes to Manual Review by default, so failed checks don’t silently disappear.
Three checks run automatically on every session regardless of your workflow configuration: Watchlist Screening, Risk Assessment, and Identity Cross-Reference. You’ll see these listed under “Runs automatically on every session” on the workflow detail page.
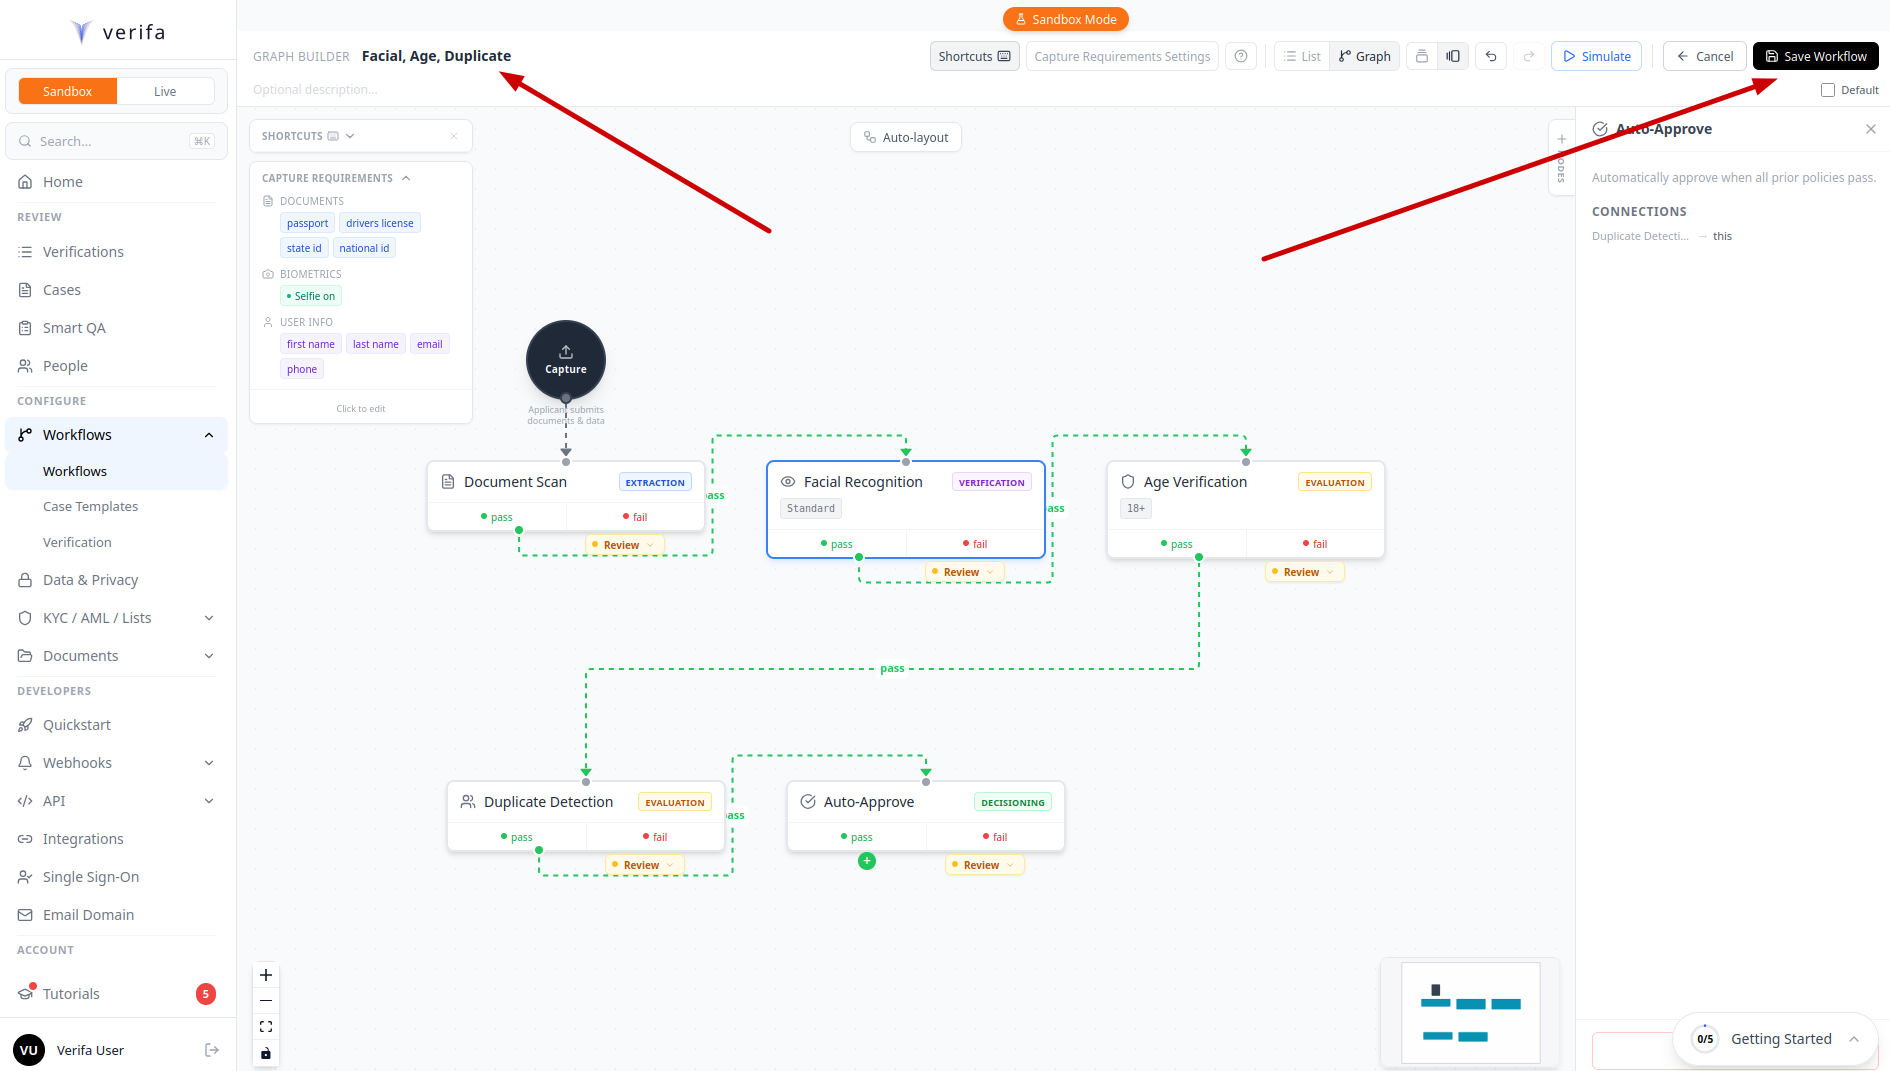
Step 11: Review capture requirements
You can review and edit the capture requirements at any time by clicking the Capture Requirements panel in the top left of the graph builder. This shows a summary of what documents, biometrics, and user info the workflow will collect.
There are multiple ways to open and edit these settings — you can click the panel header or use the Capture Requirements Settings button in the top toolbar.

Step 12: Name and save the workflow
Give your workflow a descriptive name by clicking the name field at the top of the graph builder (e.g., “Facial, Age, Duplicate”). Add an optional description.
Then click Save Workflow in the top right corner. This saves the workflow as a draft — it won’t process any sessions until you publish it.
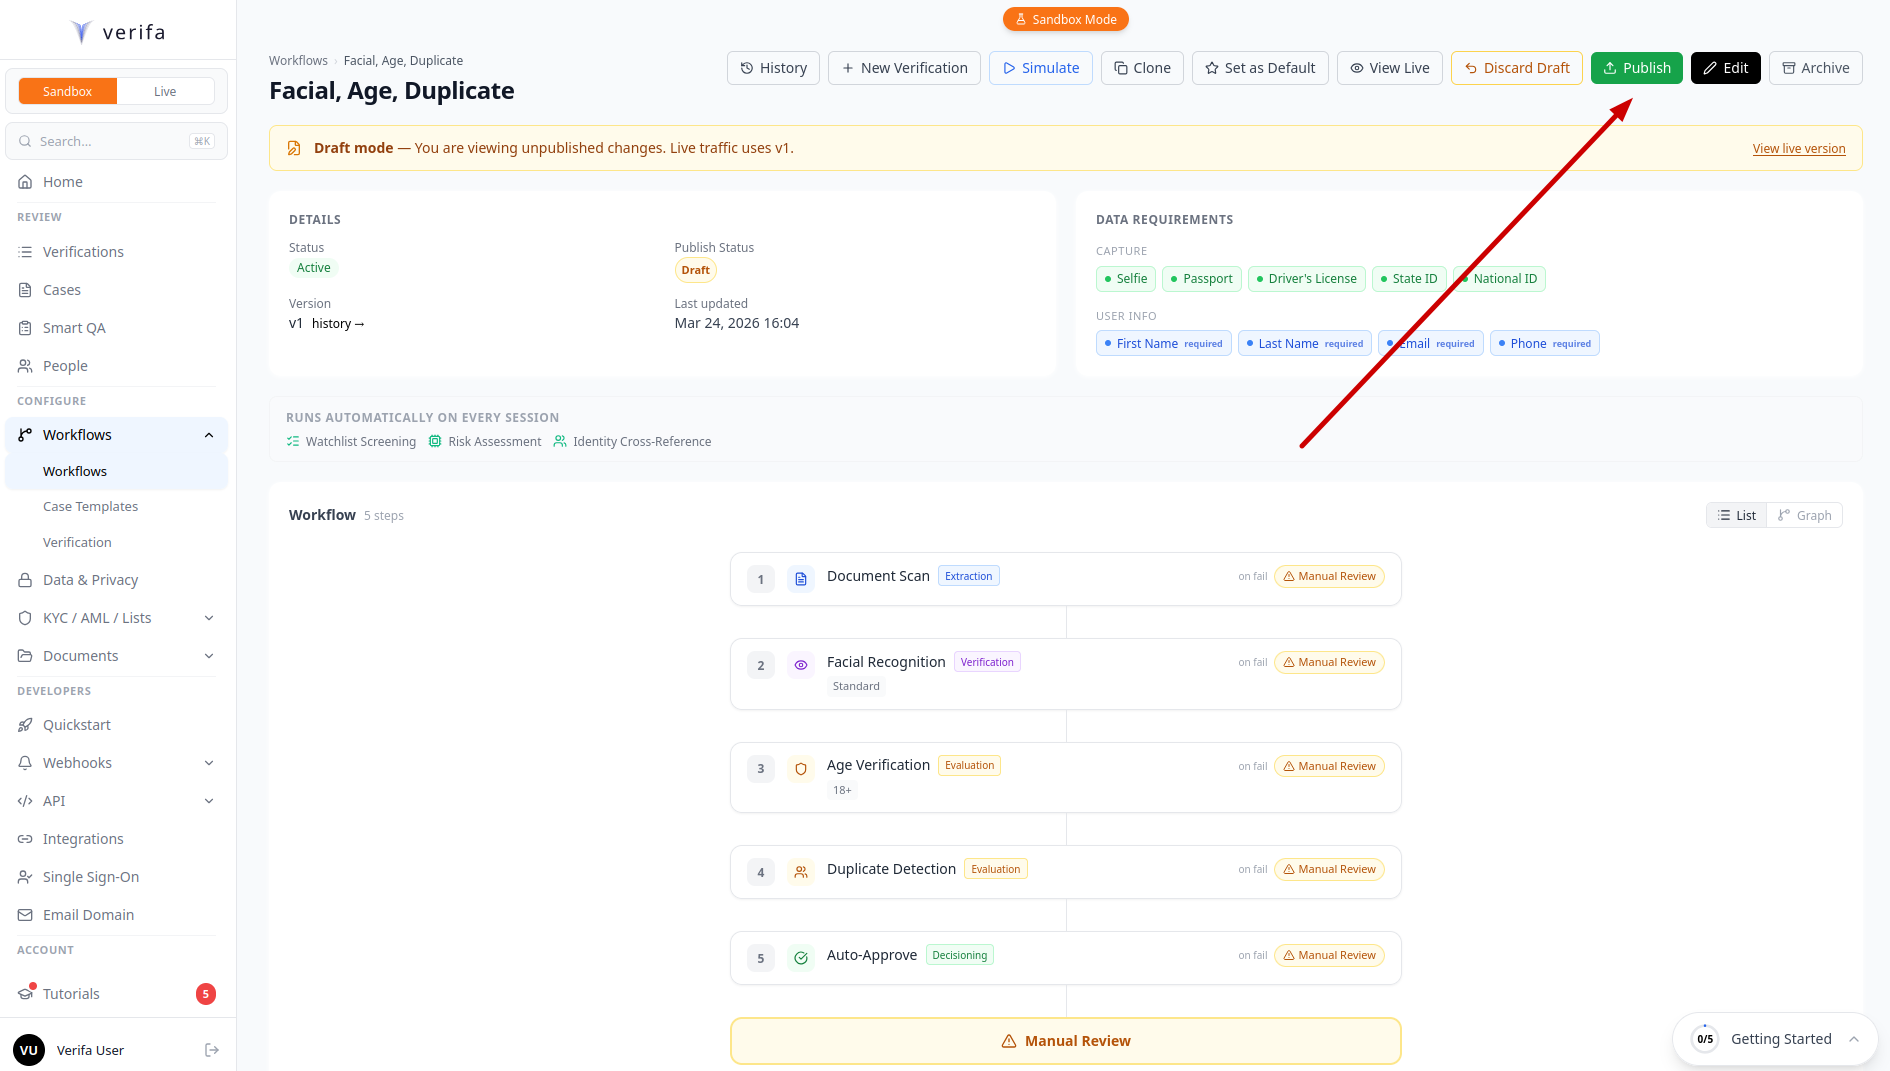
Step 13: Review the workflow detail
After saving, you’re taken to the workflow detail page. Here you can see:
- Details — Status, publish status (Draft), version, and last updated timestamp
- Data Requirements — What the capture flow will collect (documents, selfie, user info)
- Auto-injected checks — Watchlist Screening, Risk Assessment, and Identity Cross-Reference
- Workflow steps — All 5 steps in order with their fail/review routing
Click Publish when you’re ready to make the workflow live.
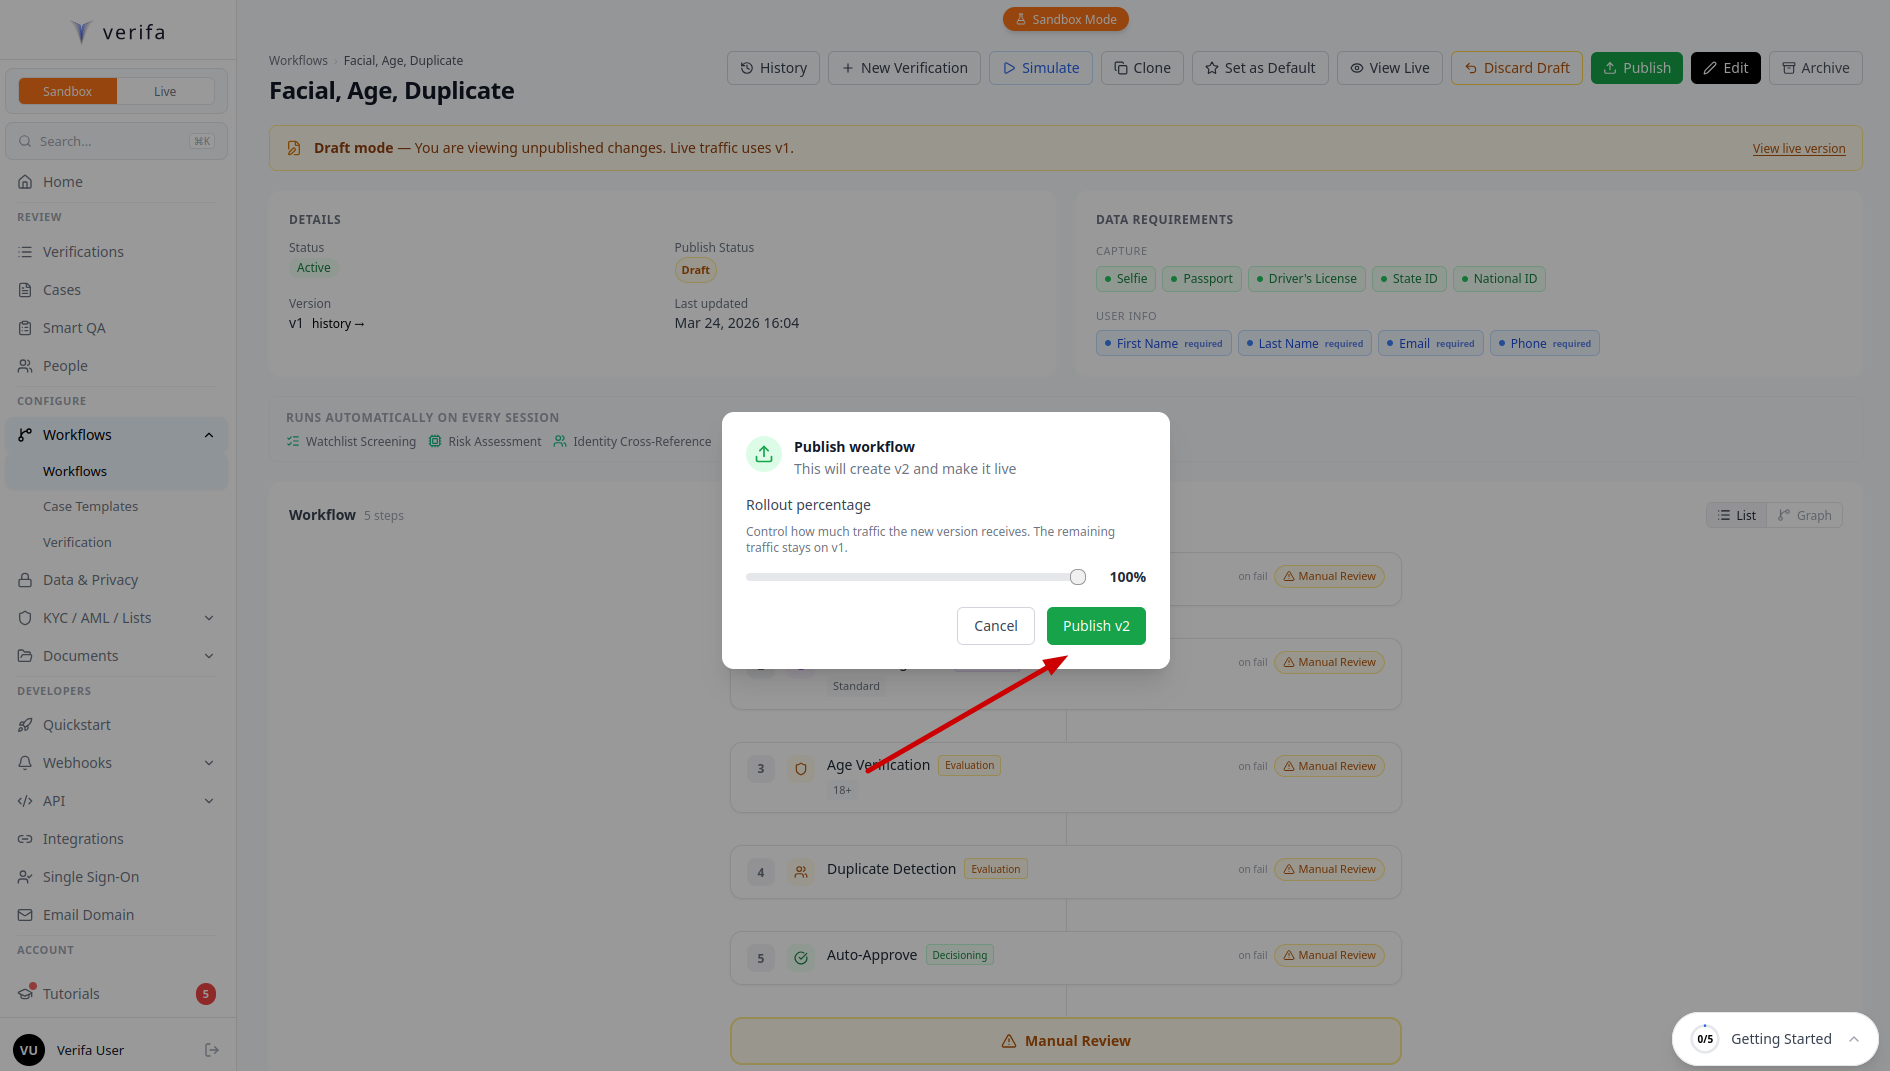
Step 14: Publish the workflow
A confirmation modal appears showing the rollout percentage. This controls how much traffic the new version receives:
- 100% — All new sessions using this workflow will run on the new version immediately
- 50% — Half of sessions use the new version, half continue on the previous version
- 10% — Canary deployment — test with a small percentage before rolling out fully
Rollout percentage lets you safely deploy workflow changes in production. For a brand new workflow, leave it at 100% and click Publish v2.
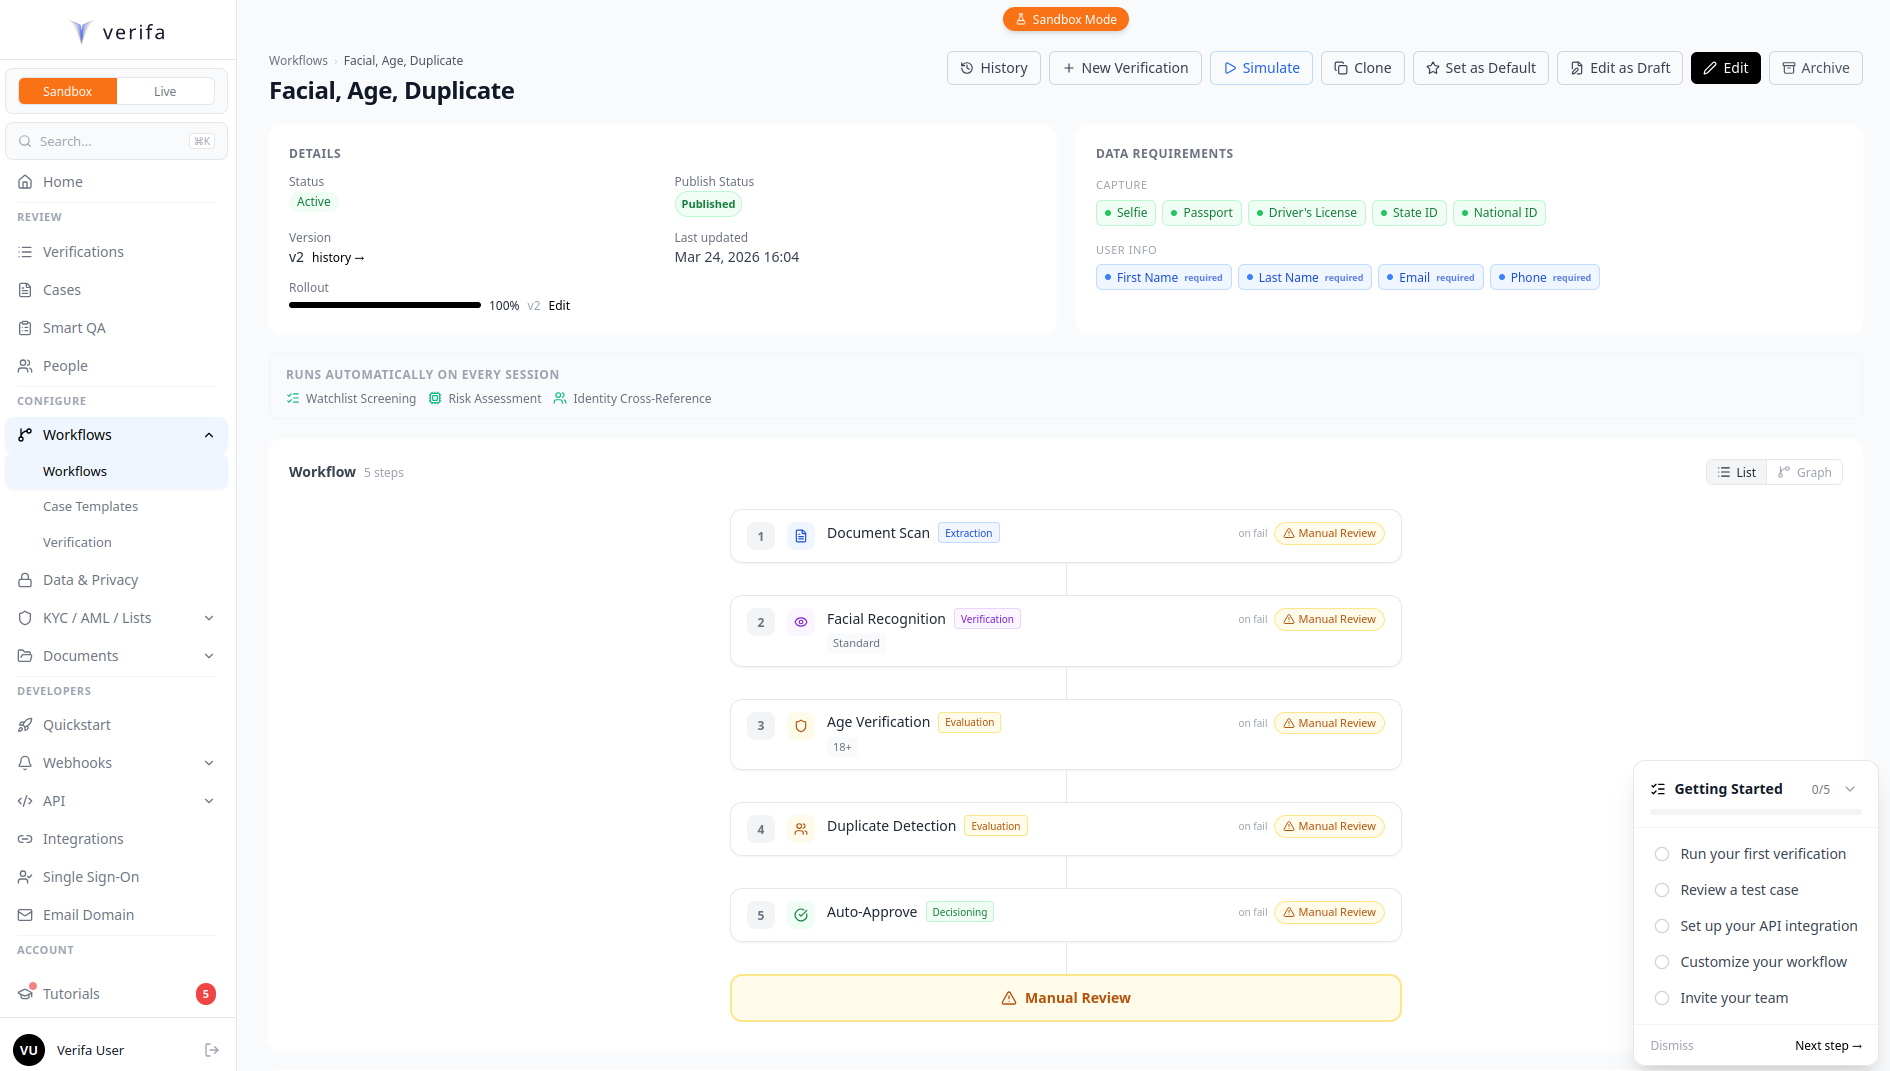
Step 15: Workflow is live
Your workflow is now Published and ready to process sessions. The detail page shows:
- Publish Status: Published
- Version: v2
- Rollout: 100%
You can click Set as Default in the top toolbar to make this the default
workflow for all new sessions, or specify it per-session by passing the
workflow_id when creating a session via the API.
Using your workflow via the API
Now that your workflow is published, create sessions that use it:
Or set it as the default workflow and all new sessions will use it automatically.
What’s next
- Quickstart — Test your workflow with a sandbox session
- Workflows — Deep dive into graph structure and conditional routing
- Verifications & Checks — All available check types
- Cases — How to review sessions routed to manual review
- Fraud Signals — The 150+ signals collected during every session